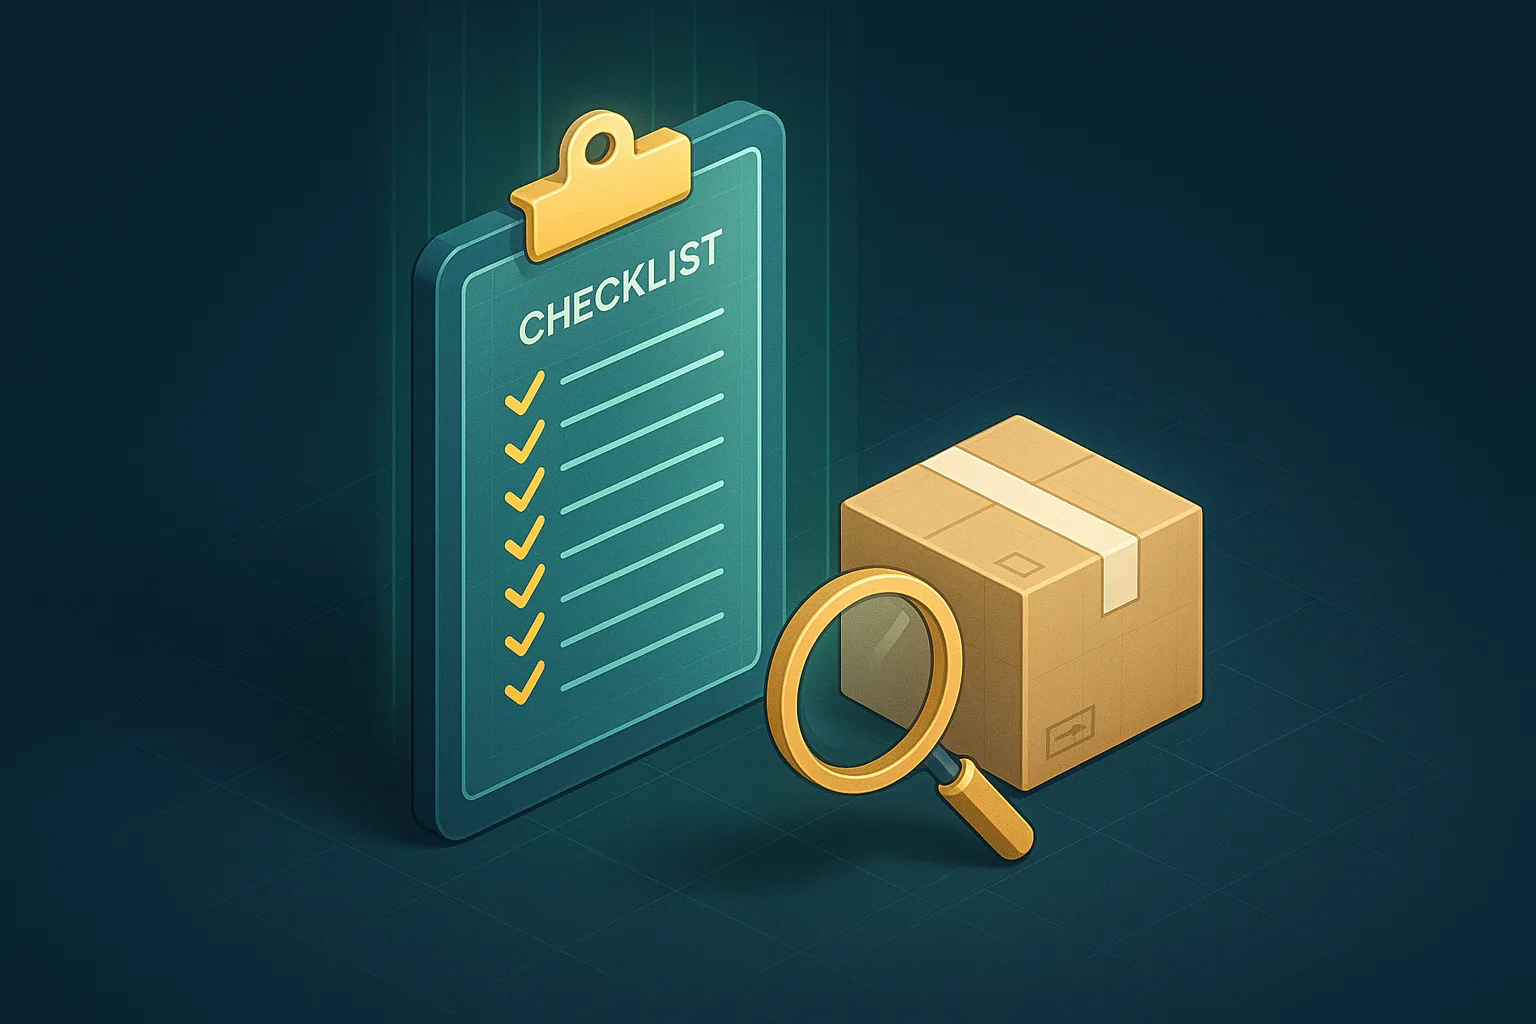
Most “how to register on Amazon Seller Central” articles skip the part that actually trips beginners up: identity verification. The signup form takes 25 minutes if you have the documents ready. Verification can take 2 to 8 weeks, and roughly 1 in 3 first-time applications gets kicked back to the seller for resubmission. Across the 47 beginners we have onboarded into FBA launches since 2022, every single Seller Central rejection has come from one of 4 specific document mistakes. This walkthrough is the 11-step process we use with paying clients, in the order we run it, with the verification traps called out as we hit them.
What Seller Central actually is (and what it’s not)
Seller Central is Amazon’s back-office portal for sellers. It is where you list products, set prices, send inventory to FBA warehouses, run PPC campaigns, read performance metrics, request reviews, handle returns, and reply to customer messages. Every click you make as an Amazon seller, from creating a listing to refunding a buyer, happens inside Seller Central.
Seller Central is not Vendor Central. Vendor Central is Amazon’s invitation-only program where you sell to Amazon, and Amazon then sells your product as the retailer. Vendor Central is closed to new applicants by default and is irrelevant for 99% of beginner FBA launches. If a YouTube guru told you to “register for Vendor Central,” they are wrong.
Seller Central is also not a marketplace listing tool. It is a full operational dashboard. You can pull reports on inventory health, ad spend, refund rate, IPI (Inventory Performance Index) score, account health, and 60 other metrics. The mistake beginners make is treating it as a one-time setup screen and never returning. Veteran sellers live inside the Account Health and Inventory pages daily.
A clean way to think about it: Seller Central is the cockpit. The listing pages, PPC campaigns, and FBA shipments are the levers. Your store’s revenue and account health are the gauges. You will spend more time in Seller Central than on Amazon’s customer-facing site once your launch is live.
Individual vs Professional account: the only first decision that matters
Amazon offers two account types. Most beginner content gets this wrong.
-
Individual seller account. Free to register. Amazon takes a $0.99 fee per item sold, on top of the standard referral fee. No monthly subscription. No access to advertising. No access to Brand Registry. No Buy Box eligibility. Capped at 40 items sold per month before Amazon forces you to upgrade.
-
Professional seller account. $39.99 per month subscription. No per-item fee. Full access to PPC advertising, Brand Registry, A+ Content, Buy Box eligibility, and bulk listing tools. Required for FBA at any meaningful volume.
The math is clean: if you are running a real FBA launch, you need Professional. The $39.99 monthly fee is recovered the moment you sell more than 40 units, and you cannot launch a private-label brand on the Individual plan because Brand Registry and PPC are locked.
We have only ever seen one beginner-fit scenario for the Individual plan, and that is testing the registration flow itself before you have inventory ready. If your samples are still in transit and you want to run through the verification flow first so you do not lose 4 weeks waiting later, register Individual now, then upgrade to Professional when the inventory hits Amazon’s warehouse. The upgrade button is one click inside Seller Central. There is no penalty.
The reverse path, downgrading from Professional to Individual, is the one to avoid. If your account hits Account Health flags and you downgrade to save the $39.99, you lose Brand Registry access mid-launch. Stay on Professional through any active launch period.
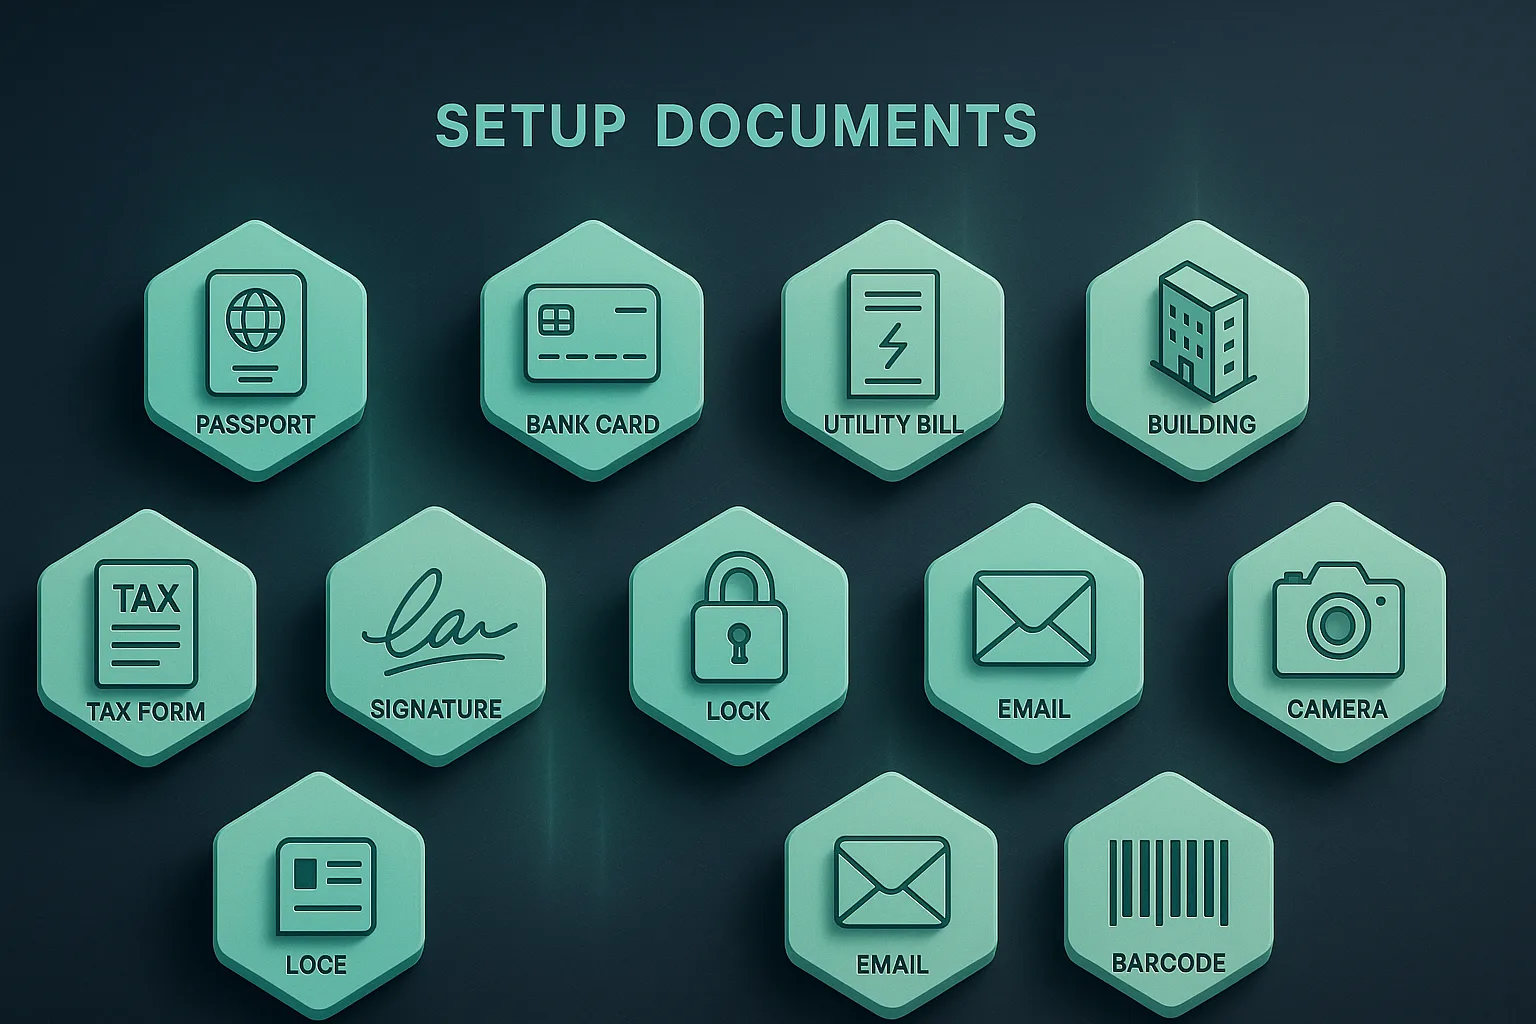
The 11 documents and accounts you need before you start
Roughly half of the beginners who reach out to us after a failed first-time application failed because they started the registration without all the documents ready. Amazon’s signup form does not let you save and resume cleanly. If you exit mid-flow, you can lose the partially-entered data, and resuming with mismatched information triggers manual verification queues that can add 2 to 4 weeks.
Get these 11 items together before you open the registration page:
-
Government-issued photo ID. Passport is the cleanest option. Drivers license also works for US sellers. Must be in color, not a black-and-white scan. The name on the ID must match the name you will enter in the account exactly, including middle name if printed on the ID.
-
Bank account in your business or personal name. Must support international wire transfers (for non-US sellers receiving USD payouts) and must be in the same name as the account holder. Amazon will not pay out to a third-party account.
-
A credit or debit card that is not prepaid. Amazon charges a small auth amount during registration to verify the card. Prepaid cards are rejected. The card must have an address that matches the seller’s address.
-
Phone number for SMS verification. A mobile number that can receive international SMS. Google Voice, Skype Number, and virtual numbers are inconsistent at receiving Amazon’s verification codes. We have seen 30% rejection rates on Google Voice. Use a real mobile number tied to a SIM.
-
Business address. This goes on file with Amazon and appears on customer-facing parts of your account (returns address by default). Can be the same as your personal address if you are launching as a sole proprietor.
-
Tax information. US sellers: SSN or EIN. Non-US sellers: a W-8BEN form gets generated inside Amazon’s tax interview during registration, no pre-prep needed. Sellers from Pakistan, India, and other countries can complete the W-8BEN inside the signup flow without an EIN.
-
A utility bill or bank statement. Must be issued within the last 90 days. Must show your name and the address you entered. The single most common verification rejection is a stale utility bill. Amazon’s verifier checks the date carefully.
-
Email address you control. Use a real custom-domain business email if you have one (yourbrand@yourdomain.com). Gmail and Outlook work but trigger more manual review queues. The account email is also your default returns-and-customer-service contact, so pick something you check daily.
-
Computer with a working webcam. Amazon’s video-verification step (introduced fully in 2024, mandatory in 2025) requires a live call where the verifier checks your face against your ID. This is the step that most non-US sellers hit at 2 to 3 AM their local time because Amazon’s verifier queue runs on US business hours. Plan accordingly.
-
UPC code from GS1 or a GTIN exemption. Not required to register, but required before you list a product. Get this in parallel with your Seller Central application so you are not blocked on day 1 of listing creation. We cover the GS1-vs-resellers tradeoff in a separate post.
-
A consistent set of contact details. This is the verification trap. Your name, address, and phone on the ID must match what you enter in the account. Your bank statement must match your address. Your utility bill must match. If any one document shows “John A. Smith” and another shows “John Smith,” Amazon’s verifier flags the application for manual review.
The 11-step walkthrough
Here is the actual order we run with clients. We block 90 minutes for this with no interruptions, all 11 documents on the desk, and a webcam-equipped laptop ready.
Step 1: Open the registration URL. Go to sellercentral.amazon.com. Click “Sign up.” Do NOT use a Google search to find the page. Amazon SEO for “sell on Amazon” is gamed by old domains and you may land on a stale signup variant. Direct URL only.
Step 2: Choose your marketplace. Amazon US (.com) is the default for most launches. UK, EU, Canada, Australia, India, and Japan each have separate Seller Central instances. Most beginner launches start with US. If you intend to expand to Canada or Mexico within the first 12 months, the North America Unified Account lets you operate all 3 marketplaces with one login. Pick the US marketplace at registration and expand later.
Step 3: Enter business location and business type. Sole proprietor is fine for most beginner launches. LLC is fine if you have already formed one. Corporation is for advanced cases. Pick what matches your actual legal structure. If you have not formed an LLC yet, sole proprietor is the right answer here, and you can update the business type later when the LLC is in place.
Step 4: Enter your legal name exactly as it appears on your ID. Include middle name if your ID has it. Mismatches at this step are the single biggest source of verification rejections.
Step 5: Enter your phone number and verify via SMS. Use a real mobile number with a SIM. If the SMS does not arrive in 60 seconds, do not retry 5 times. Wait 5 minutes, then retry. Multiple retries can flag your IP for fraud-prevention review.
Step 6: Enter business name, address, and trade name (DBA). The address must match your utility bill or bank statement. Trade name (DBA) can be your brand name, but it can also be your personal name if you have not finalized branding yet. You can update the DBA later.
Step 7: Enter your credit/debit card. Amazon charges a small auth amount (usually $1 USD, sometimes refunded automatically). The card address must match the address you entered in Step 6.
Step 8: Enter your bank account. This is where Amazon will deposit your payouts every 2 weeks once you start selling. For US sellers, ACH details. For non-US sellers, Payoneer or a US bank account in your name. Wise (formerly TransferWise) is widely accepted. Pakistani sellers can use Payoneer linked to their local bank.
Step 9: Complete the tax interview. W-8BEN for non-US sellers. W-9 for US sellers. The questions are clear if you read carefully. If you are unsure about your foreign-tax-ID line, check your country’s standard tax document (in Pakistan, this is the NTN number).
Step 10: Upload identity documents. Government photo ID front and back (passport is one page so back is optional). Utility bill or bank statement dated within 90 days. Both must show the name and address you entered. Upload as PDF or color image. Black-and-white scans fail more often than color.
Step 11: Schedule and complete the video verification call. Amazon emails you a link to schedule a live video call with a verifier. The verifier asks you to hold your ID up to the camera, asks 2 or 3 basic questions about your business, and confirms the documents match. The call is 5 to 10 minutes. Do it during US business hours if you can, even if that means waking up at 2 AM in Pakistan or 5 AM in India, because the verifier queue is shortest then and approval is fastest.
After Step 11, you wait. Amazon’s verification team reviews everything and either approves the account (1 to 7 days for clean applications) or kicks back specific documents for resubmission (2 to 6 weeks total cycle time).
Why account verification fails (and how we avoid it for clients)
Across 47 onboarded beginners, we have catalogued 4 verification-failure patterns. If you understand these before you submit, your first application is more likely to pass clean.

Pattern 1: Document name mismatch. Your ID says “John Allen Smith.” Your bank statement says “John A. Smith.” Your utility bill says “John Smith.” All three are technically you. Amazon’s verifier reads them as 3 different people and flags the application. Fix: get all 3 documents reissued with the exact same name format before you apply. This usually means asking your bank to update the name on the account, or asking the utility provider to print the full middle name. 30 minutes of phone calls beats a 4-week rejection cycle.
Pattern 2: Stale utility bill. The bill must be dated within the last 90 days. Sellers sometimes upload a bill that is 4 months old because that was the last one printed. Amazon’s verifier checks the date in the corner of the document. If it is older than 90 days, the application is held until you submit a current one. Fix: log into your utility provider’s account, download a fresh statement, and use that.
Pattern 3: Address-document mismatch. You entered your apartment number as “Apt 4B” on the account, but your utility bill prints it as “#4B” or “Unit 4B.” Amazon’s automated parser sometimes catches this and rejects the document. Fix: enter the address exactly as it prints on the utility bill, character for character, including any punctuation.
Pattern 4: Video call no-show or low-quality call. The seller misses the scheduled call, or the call connects but the video is too dark for the verifier to see the ID. Both reset the queue. Fix: schedule the call during US business hours, put your laptop in a well-lit room, and have your ID physically next to you before the call starts.
When we onboard a paying client into Seller Central registration, we run a 15-minute pre-flight checklist that catches these 4 patterns before they hit Amazon’s verifier. The pre-flight is free for clients on our service ladder. The 4-week rejection cycle is what the same checklist saves.
Account-suspension risks during setup (and how to dodge them)
Most beginners think suspension is something that happens to seasoned sellers who get hit with intellectual-property complaints. That is one suspension pattern. There is a second pattern that hits brand-new accounts in the first 60 days, and it is more common than the IP pattern.
Amazon’s risk algorithm watches new accounts for 4 behaviors that look like fraudulent-seller patterns:
-
Multiple accounts from the same IP, browser, or device fingerprint. If you previously had an Amazon Seller account (even a closed one), or someone in your household has one, and you register a new account from the same network or device, Amazon’s algorithm sees this and flags both accounts. Resolution requires submitting written proof that you and the other account holder are distinct people. This is a real headache. Fix: register from a clean network and a clean browser if anyone in your household has ever had a Seller account.
-
Listing products in the first 7 days without verified inventory. New accounts that immediately create listings for products they cannot prove they have in stock get flagged for “drop-shipping fraud” review. Fix: wait until your first FBA shipment is on its way to Amazon’s warehouse before you list. Or list with “0 inventory” and add quantity only after the shipment hits the FC.
-
Pricing way above market. New accounts that price their first listing 5x or 10x the category average get flagged for “price-gouging” review. This is rare but real, especially in categories where Amazon has historical price-gouging concerns (medical supplies, food, baby care). Fix: price within the category’s normal range. If your differentiation justifies a 20% premium, that is fine. A 500% premium will get reviewed.
-
Inactivity in the first 30 days. Counterintuitively, brand-new accounts that register and then sit idle for 30 days sometimes get flagged for “shell account” review. Fix: complete your store setup, add at least one product listing (even if at 0 inventory), and log in 2 to 3 times a week during the wait between registration and your first inventory arrival.
The pattern across all 4 risks is the same: new accounts get watched more carefully than mature ones, and the right move during the first 60 days is to look like a real seller building a real business. Verified documents, normal pricing, active login, and patience while waiting for your first inventory shipment.
After your account is live: the first 7 settings to fix
The day your account is approved, you get a Seller Central dashboard with 60 menu items. Most are not urgent. These 7 are.
1. Two-factor authentication. Amazon now requires 2FA for all sellers. Set it up with an authenticator app (Google Authenticator or Authy), not SMS. SMS 2FA can be intercepted by SIM-swap attacks. Account takeover is a real risk in 2026, and SIM-swap is the most common vector for sellers in countries with weaker SIM-issuance KYC.
2. Payout settings. Confirm your bank account details under Settings > Account Info > Deposit Methods. Set payout frequency to “every 14 days” (the default and the right answer for most launches). Disabling reserve holds is automatic once your account has 90 days of clean activity.
3. Returns settings. Settings > Return Settings. Pick your returnless-refund threshold (we recommend $5 or below: under $5, refund without requiring return; above $5, require return). Set your prepaid-return-label policy. Default: Amazon-provided prepaid label, deducted from your account.
4. Tax settings. Settings > Tax Settings. Configure your nexus states. Amazon’s MTC (Marketplace Tax Collection) handles state sales tax in 47 states automatically. You only need to configure tax settings for the 3 states where MTC does not cover you. If you are a non-US seller without US nexus, this section is mostly empty.
5. Brand Registry application (if your trademark is filed). Apply via Stores > Manage Stores > Brand Registry. You can submit with a PENDING USPTO status (you do not have to wait for full approval). Required: brand name (must match USPTO filing character-for-character), USPTO serial number, real photos of your physical product or packaging with the brand name printed on it. Amazon rejects AI-rendered mockups and Photoshop renders. Use real photos taken during your supplier’s production run.
The class-selection trick we use to file the USPTO application itself: search 3 to 5 competitor brands in your niche on the USPTO public portal at tmsearch.uspto.gov, check which Nice classification numbers they registered under, and use the same class numbers. Wrong class costs $250 and a refile cycle. The competitor-lookup trick gets it right the first time. Our clients have filed USPTO for $250, gone live on USPTO’s public portal in 2 to 3 days, and submitted Brand Registry with pending status inside the same week. We cover the full Brand Registry process in our Amazon FBA roadmap post and a dedicated Brand Registry post coming next in this series.
6. Notification preferences. Settings > Notification Preferences. Turn on email alerts for: A-to-z claims, negative reviews, account-health changes, IPI score changes, and policy violations. These are the 5 alerts that matter for new sellers. Mute the rest. Amazon’s default notification setting is everything-on, and the noise drowns the important alerts.
7. Tax interview reconfirmation. If you registered as sole proprietor and form an LLC later (typical for our beginner clients), redo the tax interview when the EIN is active. Settings > Tax Information > Update. Mismatched tax info is the #1 cause of payout holds in months 2 and 3.
When to hire help vs DIY this step
Seller Central setup is one of the genuinely DIY-friendly parts of the Amazon FBA journey. If you have the 11 documents from earlier in this post and follow the 11-step walkthrough, you can clear registration without paid help. Most of our beginner clients do this part themselves with our pre-flight checklist as a reference.
Where paid help becomes worth the money:
- You have had a Seller Central account before and it was closed for a policy violation. Reopening from a flagged account history is non-trivial and usually requires a specialist appeal.
- You are registering from a country Amazon flags more aggressively (some West African countries, parts of Eastern Europe). The verification queue is longer and document standards are stricter.
- You hit a video-verification rejection and the resubmission cycle is dragging into months 2 and 3. A specialist who has handled 50+ resubmissions can usually identify the rejection pattern in 15 minutes.
For everything else, the 11-step walkthrough above is the same process we run with our paying clients. The pre-flight document check is the highest-impact 30 minutes. The rest is patience.
If you want the full Amazon FBA operator framework from research through launch through scaling, that is what our $27 starter course covers, with 12 modules and 149 lessons walking the same step-by-step process we use with our managed clients. We currently run Amazon stores doing $200,000 per month for paying clients, and the course is that exact framework, self-paced.

Frequently Asked Questions
How long does Amazon Seller Central setup take?
The signup form itself takes 25 to 45 minutes if you have all 11 documents ready. Amazon’s verification takes anywhere from 1 to 7 days for clean applications, and 2 to 6 weeks for applications that get kicked back for document resubmission. Across our 47 onboarded beginners, the average end-to-end time from “click signup” to “account approved” is 9 days when the pre-flight document check is done correctly.
Why does Amazon reject my Seller Central application?
Across 47 client launches, 4 patterns account for almost every rejection: document name mismatches (different name format across ID, bank, and utility), stale utility bills older than 90 days, address-document mismatches (apartment number formatted differently), and video-call no-shows or low-light calls. Fix the 4 patterns before you submit and the first application usually passes.
Do I need an LLC to register on Amazon Seller Central?
No. You can register as a sole proprietor with your personal name and address, and form an LLC later. We typically have clients form the LLC in parallel with their first production order (days 15 to 30 of the launch), then update the account’s tax information when the LLC’s EIN is active. Wyoming online LLC formation through Northwest Registered Agent runs around $100 plus the state filing fee.
How much does Amazon Seller Central cost?
The Professional plan is $39.99 per month. The Individual plan is free but charges $0.99 per item sold. For any real FBA launch, Professional is the right answer, the $39.99 is recovered the moment you sell more than 40 units. There are no other fees to register or maintain the account, though Amazon does charge a small auth amount on your card during signup that is usually refunded.
Can I have two Amazon Seller Central accounts?
By default, no. Amazon’s policy is one Seller account per legal entity per marketplace. You can apply for an exception if you have a legitimate business reason (separate brands, different product categories, etc.), but exceptions require written approval before you create the second account. Setting up a second account without approval gets both accounts suspended.
Can I register Amazon Seller Central from outside the US?
Yes. Amazon US (.com) accepts sellers from over 100 countries. You complete the W-8BEN form during signup, set up a US-receivable bank account (Payoneer or Wise are common for non-US sellers), and proceed through the same 11-step flow. Pakistani, Indian, and Filipino sellers in particular have been routine on US Amazon for years. The video verification call is the one extra friction, schedule it during US business hours.
Will Amazon reject my account if I use a Gmail address?
No, Gmail and Outlook work. They do route the application through more manual review queues than custom-domain emails (yourbrand@yourdomain.com), which can add a few days to verification. If you already have a custom-domain business email, use it. If not, Gmail is fine, just expect a slightly longer verification cycle.
What happens if my video verification call fails?
Amazon emails you within 24 hours with the reason (usually “ID not clearly visible” or “no-show”). You schedule a second call. The second call usually succeeds if you address the first-call issue (better lighting, ID held closer to camera, scheduled during US business hours). 3 failed video calls in a row triggers a manual review of the whole application, which adds 2 to 4 weeks.
The Bottom Line
Amazon Seller Central setup is one of the cleaner steps in an FBA launch, but only if you front-load the document prep. The 11-document checklist is what separates 10-day approvals from 6-week appeals. The 11-step walkthrough is the execution. The 4 rejection patterns are the traps. Together, they take the average beginner from “I cannot get my account approved” to a clean first-time pass in under 10 days.
The setup is not the hard part of an Amazon launch. The hard part is what comes after: product research, sourcing, listing optimization, PPC budgeting, and surviving the first 90 days of low margin before the launch ramp pays for itself. We have onboarded 47 beginners through that full sequence since 2022, and the framework is the same one we use with our managed clients running $200,000 per month combined revenue on Amazon today.
If you want the operator framework end-to-end, the $27 starter course walks the same step-by-step process, condensed into 12 modules with 149 lessons. Self-paced. Includes free community access plus 13 stacked bonuses.
Based in Karachi, Pakistan. Half a decade serving US Amazon sellers since 2020.